How to Read a Bass Lead Sheet

Bass Player

If you’re learning bass guitar, knowing how to read a bass lead sheet opens up a huge range of songs you can play. With that skill, you’d be able to work on songs from jazz standards to modern pop and rock. Unlike full notation or tab, a lead sheet gives you:

  • chord symbols
  • rhythms to play in sync with the drummer
  • rehearsal marks outlining the different sections of the song

Once you get use to read a bass lead sheet you’d be free to interpret and build your own bass line based on the lead sheet.

What Is a Lead Sheet?

A lead sheet shows the chord progression of a song (e.g. C, Am, F, G) along with the rhythm and structure, but doesn’t dictate exact notes to play. For bass players, this means you’re expected to construct a bass line using the chord’s root note and related notes, rather than playing something written out note-for-note.

Understanding Chord Symbols

Chord symbols tell you which chord is being played at that point in the song. An example of chord symbols would be something like “Cmaj7” or “Dm7”. As a bass player, your starting point is usually the root note of the chord (the letter itself), which anchors your bass line and locks in with the harmony the rest of the band is playing.

Reading the Rhythm

Lead sheets use rhythm slashes or simple beat markings to show when chords change, rather than specific note durations. This gives you freedom to create your own rhythmic feel. Be sure however to follow where the chord changes fall in the bar, so your bass line supports the song correctly.

Building a Basic Bass Line

A simple starting approach: play the root note on beat one of each new chord, then add the fifth or octave on other beats to create movement. As you get more comfortable, you can add passing notes and rhythmic variation, but the root-note foundation is what keeps you locked in with the rest of the band.

Practice Tips

Start with a simple lead sheet. A simple song which only uses 3 to 4 chords per song. Be sure to focus purely on playing roots in time before adding anything more complex. If you’re a current student, bring a lead sheet you’re working on to your next bass guitar lesson, and Pat can help you build lines that fit the song properly. For extra chord reference, sites like Ultimate Guitar have a huge library of lead sheets and chord charts to practice with.

Ready to Learn Bass Guitar Properly?

Reading lead sheets is a core skill for any working bassist. Book a free trial bass guitar lesson with Jam Station Music in Nunawading, and Pat will help you build real groove, technique and reading skills from the ground up.

Basic Breathing Techniques for Singers

Singing

Good breathing techniques for singers form the foundation of every other vocal skill, including tone, pitch control, breath support, and even confidence on stage. All these issues trace back to how well you manage your breath. If you’re just starting out, learning to breathe properly for singing (rather than just normal everyday breathing) is one of the most valuable habits you can build early.

Why Breathing Matters So Much for Singing

Unlike speaking, singing demands sustained control over your breath, particularly when holding long notes, phrasing lyrics, and controlling dynamics all rely on how well you manage airflow. Poor breathing habits often lead to a strained, thin, or inconsistent sound, even when pitch and technique are otherwise solid.

Diaphragmatic Breathing

Most breathing techniques for singers start with learning to breathe from the diaphragm rather than the chest. Try this simple exercise: place one hand on your stomach, breathe in slowly through your nose, and feel your stomach expand outward rather than your shoulders lifting. This is the foundation breath singers train to use.

Controlled Exhale Exercise

Once you’re comfortable breathing diaphragmatically, practice a slow, controlled exhale, then breathe in for 4 counts, then exhale steadily over 8 counts. Be sure to keep the airflow even rather than letting it rush out. This builds the breath control needed to sustain longer phrases while singing.

Common Mistakes to Avoid

  • Breathing too shallow (chest-only breathing) rather than engaging the diaphragm
  • Tensing the shoulders or neck while breathing in
  • Running out of air mid-phrase due to poor breath planning
  • Gasping for air rather than taking a calm, controlled breath between phrases

Practice Tips

Spend just 5 minutes a day on breathing exercises before you even start singing — this builds the habit without the pressure of also thinking about pitch or lyrics at the same time. If you’re a current student, bring any songs you’re finding breath-control tricky to your next voice lesson, and Pat can work through phrasing and breath planning with you directly.

Ready to Learn Voice Properly?

Breathing technique is just the beginning of building a strong, confident singing voice. Book a free trial voice lesson with Jam Station Music in Nunawading, and Pat will help you build real vocal technique from the ground up.

Basic Drum Rudiments Every Beginner Should Practice


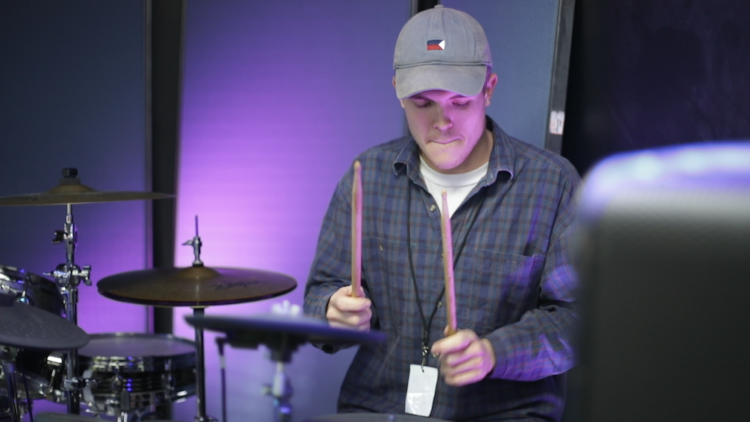
If you’re new to drums, learning a handful of basic drum rudiments early on will do more for your technique than almost anything else you can practise. Rudiments are the fundamental building blocks of drumming. You will see how these small patterns (rudiments) of stick movements show up again and again once you start playing full songs. Mastering them slowly and correctly now saves a lot of frustration later.


What Are Drum Rudiments?


Rudiments are standardised sticking patterns of single strokes, doubles, and other movements. These sticking patterns form the foundation of most drum patterns and fills you’ll eventually play. There are 40 officially recognised rudiments, but as a beginner, you only need a small handful to start building real control and confidence.


The Single Stroke Roll


The simplest rudiment of all is the Single Stroke Roll. For a right handed player the Single Stroke Roll is played by the alternating strikes of right hand then left hand (R L R L). If you are left handed, start with (L R L R).

It sounds basic, but playing it cleanly, at a consistent volume, and without rushing or slowing down is harder than it looks. This is usually the very first rudiment any drum student learns.


The Double Stroke Roll


This rudiment doubles up each hand before switching, like this: R R L L R R L L. This is the foundation for building speed and control later on. It takes longer to feel natural than the single stroke roll, so patience here pays off.


The Paradiddle


This rudiment is a slightly more complex pattern , R L R R, then L R L L. The paradiddle combines single and double strokes together. It’s an extremely common building block in fills and grooves, so it’s well worth the extra practice time it takes to get comfortable with.


Practice Tips

Start slow, much slower than feels necessary. Be sure to use a metronome from the very beginning. Speed should only increase once you can play a rudiment cleanly and evenly at a slower tempo. Rushing this step is one of the most common mistakes beginner drummers make. Just 5-10 minutes of focused rudiment practice a day makes a noticeable difference over a few weeks.

Eventually regardless of what your favoured hand is, you should be able to play these rudiments starting with either Left of Right hand.

If you’re a current student, ask about incorporating basic drum rudiments into your next drum lesson. Working through them with feedback on your grip, posture and timing speeds up progress significantly. For extra practice resources, sites like Drumeo have free rudiment exercises and play-alongs worth trying between lessons.


Ready to Learn Drums Properly?


Rudiments are a great starting point, but structured lessons with real feedback make all the difference in building proper technique. Book a free trial drum lesson with Jam Station Music in Nunawading, and Pat will help you build a strong foundation from your very first session.

How to Read Sheet Music: A Beginner’s Guide

Manuscript Paper Pic


If you’re just starting piano, learning how to read sheet music might feel overwhelming at first, but once you understand a few core building blocks, it becomes far more manageable than it looks. Unlike guitar tab, sheet music represents both pitch and rhythm using a standard system used across almost all instruments, which makes it an incredibly useful skill once it clicks.


The Staff and Clefs

Sheet music is written on a staff, five horizontal lines and four spaces, each representing a different pitch. For piano, you’ll typically read two staves at once: a treble clef (usually played with your right hand) and a bass clef (usually played with your left hand), joined together as a grand staff.

The treble clef’s lines and spaces (from bottom to top) spell out the notes E-G-B-D-F and F-A-C-E, while the bass clef uses G-B-D-F-A and A-C-E-G. Many students use memory tricks like “Every Good Boy Does Fine” to remember these. Ask your teacher for a few if you’re finding it tricky to memorise.


Understanding Note Values and Rhythm

Alongside pitch, sheet music also tells you how long to hold each note. A few of the most common note values you’ll encounter early on:

  • Whole note – held for 4 beats
  • Half note – held for 2 beats
  • Quarter note – held for 1 beat
  • Eighth note – held for half a beat

Learning how to read sheet music properly means training your eye to read pitch and rhythm together, rather than one at a time. This becomes much more natural with consistent practice.


Middle C: Your Reference Point


Middle C is one of the most useful notes to learn early, since it sits right between the treble and bass clefs and acts as a natural reference point for finding your way around the rest of the staff. Once you can confidently locate Middle C, working outward to nearby notes becomes much easier.


Practice Tips

Start by reading small sections slowly, one hand at a time, before combining both hands together. It’s tempting to want to play a whole piece straight away, but breaking it into smaller chunks for even just a few bars can build accuracy and confidence much faster than trying to push through mistakes.

If you’re a current student, bring any sheet music you’re finding tricky to your next piano lesson. Working through it together with feedback in real time makes a big difference. For extra practice between lessons, a free tool like musictheory.net has simple note-reading exercises worth trying.


Ready to Learn Piano Properly?

Reading sheet music is a skill that develops over time with the right guidance. Book a free trial piano lesson with Jam Station Music in Nunawading, and Pat will help you build real confidence at the keys, one step at a time.

How to Read Guitar Tab for Beginners

Manuscript Paper Pic

If you’re just starting out on guitar, learning how to read guitar tab is one of the fastest ways to start playing real songs. Unlike traditional sheet music, guitar tablature (usually just called “tab”) doesn’t require you to already know music theory. It simply shows you where to place your fingers on the fretboard. Once you understand a few basic symbols, you’ll be able to read almost any tab you find online, and start playing songs much sooner than you might expect.

What Is Guitar Tab?

Guitar tab uses six horizontal lines, with each line representing one string on your guitar. The top line is your thinnest string (high E), and the bottom line is your thickest string (low E). Numbers placed on these lines tell you which fret to press down, and on which string.

This is different to standard music notation, which uses a five-line staff and note symbols to represent pitch and rhythm. Tab strips all of that away and just shows you finger placement, which is exactly why it’s such a popular starting point for beginners learning how to read guitar tab for the first time.

Reading Your First Tab

Here’s how the numbers work:

  • A “0” means play the string open, ie, no fingers pressed down at all.
  • A “3” means press down on the third fret of that string, then pick it.
  • When numbers are stacked vertically on top of each other, it means play those notes together, like a chord.

Tab is read left to right, just like a sentence, where each number or group of numbers represents the next note (or chord) in the song.

Common Symbols You’ll See

As you start reading more tab, you’ll come across a few extra symbols beyond plain numbers:

  • h – hammer-on: play a note, then “hammer” a finger onto a higher fret without picking again
  • p – pull-off: the reverse of a hammer-on, removing a finger to sound a lower note
  • / and \ – slide up or down between two frets
  • b – bend the string to raise its pitch

These symbols add expression and technique to a piece, and they’re worth practising slowly at first, since timing matters as much as finger placement.

Practice Tips

Start with short and simple tabs. Even a single string melody would serve you well as a prep before moving on to full songs. It’s tempting to jump straight into your favourite song, but choosing something matched to your current skill level makes the process far less frustrating, and helps the habit of reading tab click into place faster.

If you’re a current student, ask your teacher to recommend a tab that matches what you’re working on in your guitar lessons. A good starting point makes a big difference to how quickly this skill sticks. For extra practice tab resources, sites like Songsterr let you follow along with tab in real time as a song plays, which is a great way to connect what you’re reading to what you’re hearing.

Ready to Learn Guitar Properly?

Reading tab is a great first step, but nothing beats structured lessons with proper feedback on technique, timing and posture. Book a free trial guitar lesson with Jam Station Music in Nunawading, and Pat will help you build real skill — from your very first chord through to playing the songs you love.